How To Make Self Rising Flour At Home: A Simple Guide
Baking at home can be such a joyful thing, and having the right ingredients on hand makes it even better. There are times, though, when you might reach for a specific item, like self-rising flour, and realize your pantry is, well, empty. It happens to all of us, honestly. But what if you could whip up your own batch in just a few moments? You absolutely can, and it's a very simple process.
You see, this special kind of flour is a staple in many southern recipes, lending a lovely lift and a bit of flavor to baked goods. It is often used for things like light, fluffy biscuits, or perhaps some tender cakes. Knowing how to make self rising flour at home means you are never stuck without it, which is pretty handy, in a way, for those spontaneous baking urges.
In this article, we will explore how to make homemade self-rising flour. It's truly just a basic formula that uses three common items: flour, baking powder, and salt. Perfect for biscuits, cakes, and more, you'll find this skill quite useful, too.
- Harley West Bio Wikipedia Age Height Boyfriend
- Carter Belfort Biography Net Worth Age College
- Maureen Kelly Bio Wiki Age Height Family
- What Happened To Tina Turner S Sister
- Kenny Babyface Edmonds Finalizes Divorce With Nicole
Table of Contents
- What is Self-Rising Flour?
- Why Make Your Own?
- The Simple Ingredients You Need
- How to Make Self Rising Flour: Step-by-Step Instructions
- Tips for Best Results
- What Can You Make with Homemade Self-Rising Flour?
- Frequently Asked Questions About Self-Rising Flour
- Ready to Bake?
What is Self-Rising Flour?
Self-rising flour is, in essence, a pre-mixed baking convenience. It combines regular flour with a rising agent and a bit of salt. This means you do not need to add those separate ingredients when you are following a recipe that calls for it. It is, you know, already in there.
This type of flour tends to be a bit softer, too, usually made from a lower protein wheat. This characteristic helps create baked goods with a tender, delicate crumb. It is why it is so often chosen for things like fluffy pancakes or those famous Southern biscuits, as a matter of fact.
The leavening action comes from the baking powder, which reacts when wet and then again with heat. This reaction produces gas bubbles, making your baked goods puff up and become airy. The salt is there for flavor, and also to help control the baking powder's action, in a way.
- Sam Frank 360 Twirl Video Who Is
- Ryan Reynolds Brothers Meet Patrick Reynolds
- Ify Nwadiwe And Wife Aurora Has A
- Who Is Kendra Hatcher His Wiki Details
- Taylor Swift Buys A 2 5 Million
Why Make Your Own?
Making your own self-rising flour has some good points. For one, it saves you a trip to the store if you suddenly need it. You might not always keep a separate bag of self-rising flour around, especially if you only use it sometimes.
Another reason is ingredient control. When you make it yourself, you know exactly what goes into your mix. This can be important for folks who are careful about what they eat or who have certain dietary needs, or something like that.
It can also be a little bit more cost-effective. Buying all-purpose flour, baking powder, and salt separately and mixing them as needed can sometimes be cheaper than buying a specialty bag of self-rising flour. Plus, you get to use up ingredients you already have, which is pretty nice.
This method offers a lot of flexibility, too. You can make just the amount you need for a recipe, so there is no leftover specialty flour sitting in your pantry getting old. It is a very practical skill for any home baker, honestly.
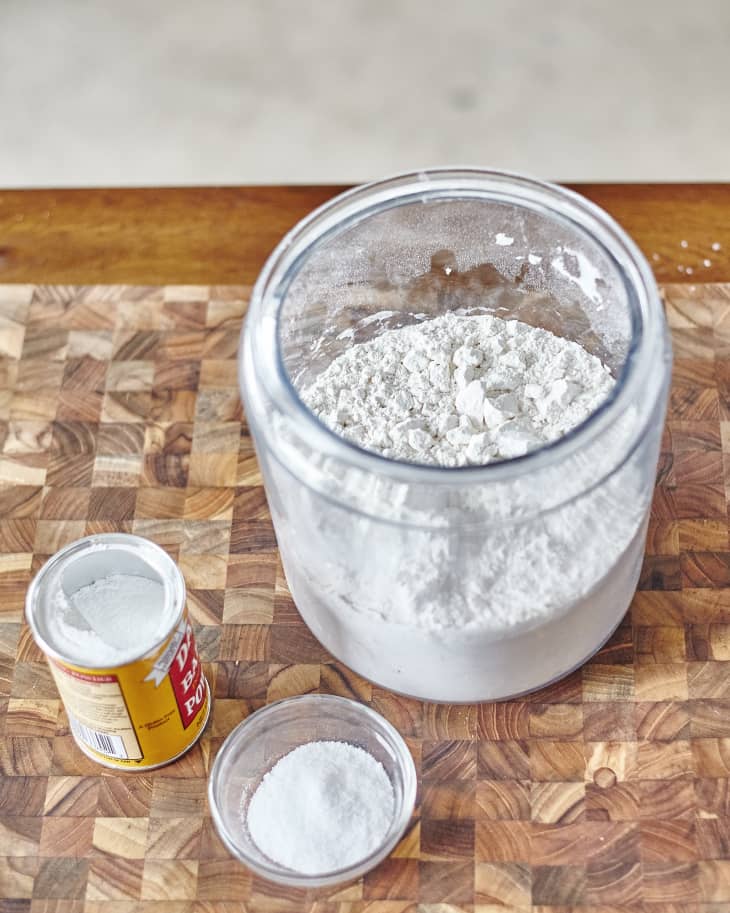
The Simple Ingredients You Need
To learn how to make self rising flour, you really only need three things. These are items most home kitchens probably have already. It is a very simple list, as you will see.
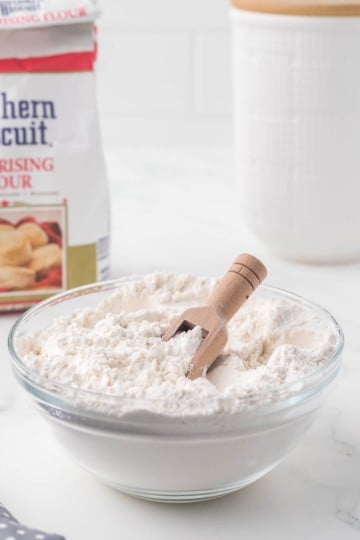
All-Purpose Flour
This is the base of your self-rising flour. All-purpose flour is a common type of flour, good for many different baking projects. It has a moderate protein level, which makes it quite versatile for lots of recipes. You want to use a fresh bag for the best results, naturally.
When picking your all-purpose flour, just choose a regular, unbleached kind. Some bleached flours might react differently with the baking powder, so sticking to unbleached is a safe bet. This ensures your homemade mix works as it should, you know.
Baking Powder
Baking powder is the ingredient that makes your baked goods rise. It is a chemical leavening agent. Most baking powders sold today are "double-acting," meaning they create gas bubbles twice: once when mixed with liquid, and again when heated in the oven. This gives your items a good, consistent lift.
It is very important that your baking powder is fresh. Old baking powder loses its strength over time, and your baked goods will not rise properly. To check if it is still good, put a teaspoon of it into a small bowl and pour a quarter cup of hot water over it. If it fizzes up right away, it is still active. If not, it is time for a new container, by the way.
Salt
Salt plays a couple of roles in baking. It helps to bring out the flavors of the other ingredients, making your biscuits or cakes taste better. It also helps to control the action of the baking powder, preventing too rapid a rise. A little bit goes a long way here, so you just need a small amount.
For this recipe, plain table salt or fine sea salt works well. Just make sure it is a fine grain so it mixes evenly with the flour and baking powder. Coarse salts might not distribute as well, which is something to consider, you know.
How to Make Self Rising Flour: Step-by-Step Instructions
Making your own self-rising flour is truly quite straightforward. You just need to get the measurements right and mix everything together properly. It takes only a few minutes, honestly.
Step 1: Measure Your Flour
For every cup of all-purpose flour you plan to use, you will need to add the other ingredients. It is a good idea to measure your flour accurately. Scooping flour directly from the bag can pack it down, giving you more than you actually need. Instead, gently spoon the flour into your measuring cup until it overflows, then level it off with a straight edge, like the back of a knife. This method helps ensure you get the right amount, which is pretty important for baking success.
So, for one cup of all-purpose flour, this is your starting point. If your recipe calls for two cups of self-rising flour, you would start with two cups of all-purpose flour, obviously. Just make sure your measuring cups are dry, too.
Step 2: Add Leavening
Once your flour is measured, it is time to add the baking powder and salt. The standard ratio for how to make self rising flour is 1 ½ teaspoons of baking powder and ¼ teaspoon of salt for every cup of all-purpose flour. This formula works quite well for most recipes that call for self-rising flour.
So, if you measured one cup of all-purpose flour, you would add 1 ½ teaspoons of baking powder and ¼ teaspoon of salt to that flour. If you are making a larger batch, just multiply these amounts accordingly. For example, for two cups of flour, you would use 3 teaspoons of baking powder and ½ teaspoon of salt. It is a very consistent ratio, in a way.
Step 3: Mix It Well
This step is probably the most important for ensuring your homemade self-rising flour works as it should. You need to make sure the baking powder and salt are evenly distributed throughout the flour. If they are not, some parts of your baked goods might rise more than others, or taste too salty in spots. That would not be very good, you know.
The best way to mix it is to whisk everything together thoroughly. You can use a balloon whisk and just whisk it for about 30 seconds to a minute. Another good method is to sift the ingredients together. Sifting helps to break up any lumps in the flour and ensures a really even blend of all the components. You could even sift it two or three times for extra assurance, which is something some bakers do, apparently.
After mixing, your homemade self-rising flour is ready to use right away. You can just proceed with your recipe as planned. It is really that simple to prepare, honestly.
Tips for Best Results
While making self-rising flour at home is straightforward, a few small tips can help you get the very best outcome. These suggestions help ensure your baked goods turn out just right, every time, or something like that.
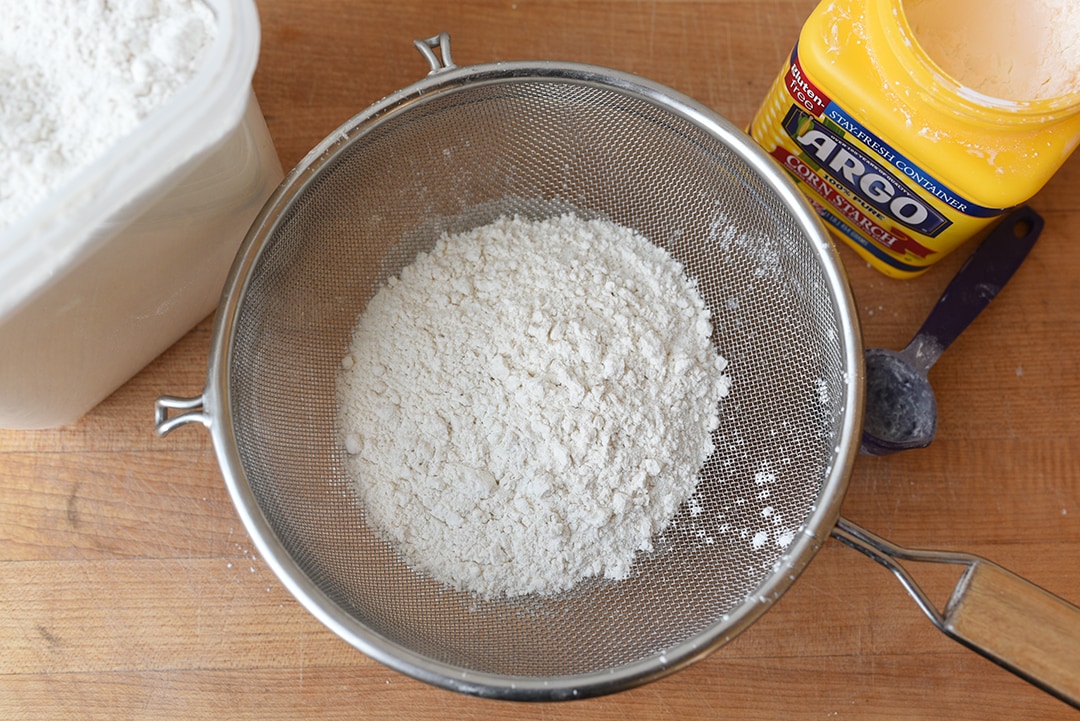
Sifting for Lightness
As mentioned before, sifting your ingredients together is a great idea. It does more than just mix them; it also adds air to the flour. This aeration helps to create a lighter, fluffier final product. When flour is airy, it mixes more easily with other ingredients and can contribute to a more tender texture in things like biscuits or cakes. It is a simple step that makes a noticeable difference, you know.
If you do not have a sifter, you can use a fine-mesh sieve. Just push the flour mixture through it with a spoon or your hand. Even whisking vigorously for a minute or two will help, but sifting is truly the best for lightness, generally speaking.
Freshness Matters
The freshness of your baking powder is incredibly important. Baking powder loses its effectiveness over time, especially once the container has been opened. If your baking powder is old, your homemade self-rising flour will not work correctly, and your baked goods will not rise. Always check the expiration date on your baking powder, and do the fizz test if you are unsure. Using fresh ingredients is key to good baking, pretty much always.
Similarly, using fresh all-purpose flour is also a good idea. While flour lasts a while, very old flour can sometimes pick up off-flavors or become less effective. So, just try to use ingredients that are relatively new, if you can, anyway.
Storage Suggestions
It is best to make homemade self-rising flour just before you plan to use it. This is because baking powder starts to lose its power once it is exposed to air and moisture. If you mix a large batch and store it for a long time, it might not be as effective when you finally go to use it. So, just mix what you need for the moment, basically.
However, if you do want to make a small amount ahead of time, store it in an airtight container in a cool, dry place. A pantry or cupboard is usually fine. Try to use it within a few weeks for the best results. Beyond that, the baking powder might start to weaken, which could affect your baking, obviously.
What Can You Make with Homemade Self-Rising Flour?
Once you know how to make self rising flour, a whole world of baking opens up. This flour is incredibly versatile, especially for those recipes that call for a tender, light texture. It is a favorite for many traditional comfort foods, as a matter of fact.
Think about classic Southern biscuits. They rely on self-rising flour for their signature fluffy crumb and good rise. With your homemade version, you can whip up a batch of these warm, buttery delights anytime. You could serve them with jam, gravy, or just a pat of butter, you know.
Pancakes and waffles also benefit greatly from self-rising flour. It helps them become wonderfully light and airy, creating that perfect breakfast experience. Just imagine a stack of fluffy pancakes, perhaps with some maple syrup. It is a really good use for this flour, essentially.
Many quick breads, like muffins, scones, and some simple cakes, also work well with self-rising flour. It provides the necessary lift without needing separate additions of baking powder or baking soda. This simplifies the recipe and helps ensure a consistent result. It is very convenient for those kinds of bakes, too.
You can even use it for certain types of cookies, especially those meant to be soft and cake-like. It helps them spread just right and keeps them tender. So, really, it is a rather useful ingredient to have ready, whether store-bought or made at home, to be honest.
For more baking ideas, you can learn more about baking tips and tricks on our site, and perhaps link to this page for more quick bread recipes.
Frequently Asked Questions About Self-Rising Flour
Can I use homemade self-rising flour in any recipe that calls for it?
Yes, you can absolutely use your homemade self-rising flour in any recipe that asks for it. The ratio of flour, baking powder, and salt in your homemade version is basically the same as what you would find in store-bought self-rising flour. So, just swap it in cup for cup, and your recipe should turn out just fine, pretty much always.
What if I only have bleached all-purpose flour?
While unbleached all-purpose flour is generally suggested for making self-rising flour, you can still use bleached all-purpose flour if that is all you have. The main difference is that bleached flour has a slightly different protein structure and might react a little differently with the baking powder. However, for most home baking, the difference will be very small, and your baked goods will still turn out well. So, it is usually okay to use it, if that is your only option, basically.
How long does homemade self-rising flour last?
It is best to use homemade self-rising flour right after you make it. The baking powder starts to lose its strength once it is mixed with the flour and exposed to air. If you need to store it, keep it in an airtight container in a cool, dry spot for up to a few weeks. Beyond that, the rising power might weaken, and your baked goods might not rise as much. Freshness truly helps, you know.
Ready to Bake?
Knowing how to make self rising flour gives you a lot of freedom in the kitchen. You will not have to worry about running out, and you can always have this useful ingredient ready for your baking projects. It is a simple skill that really pays off, especially when you are craving some fresh, warm biscuits or a soft, comforting cake. You can just whip it up and get baking, which is pretty convenient, if you ask me.
This little trick, you see, is a wonderful addition to any home baker's collection of useful knowledge. It is all about making baking easier and more enjoyable. So, go ahead, give it a try the next time a recipe calls for self-rising flour and you find yourself without it. You will probably be quite pleased with how simple it is, actually. For more information on baking science and ingredients, you might find this trusted baking resource helpful, too.
- Kanwal Rekhi Net Worth Income Salary Earnings
- M I A Rapper Family Husband Children
- Dr Cade Hunzeker Cause And Death How
- What Is Mike Johnson S Net Worth
- Delaynee Nelson Bio Age Wiki Facts And
How to Make Self-Rising Flour (By Adding Baking Powder) | The Kitchn
How to Make Self Rising Flour — Bless this Mess
How to Make a Cake Flour Substitute in 5 Minutes | Let's Eat Cake
